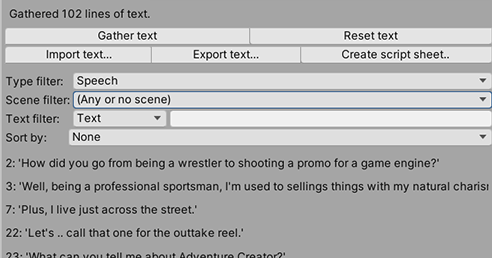
In the last tutorials, we gathered up our game text so that we could link up audio files to speech:
This gathered text can also be used to provide translations. In the "Languages" heading, click Create new translation, and enter the translation's language into the text box that appears.
![]()
Selecting any of the gathered lines below will now reveal a new text box for that language - into which we can supply a translation:
![]()
However, it's a lot easier to create translations in a spreadsheet file. If you click the cog icon beside the language's label field, click Export to bring up the Text export wizard:
![]()
From here, you can choose exactly what to export, and what sorting rules to apply. Click Export CSV when ready, and you will be prompted to save a CSV file. CSV files are spreadsheets, and can be opened by Excel and OpenOffice, amongst other tools.

Update the CSV file with appropriate translations, and then go back to the Speech Manager. Again click the cog icon beside the language's name, and choose Import. This will prompt you to re-select the CSV file, and then open the Text import wizard:
![]()
From here, you can specify which columns to import, and into which language. When ready, click Import CSV and the update process will begin.
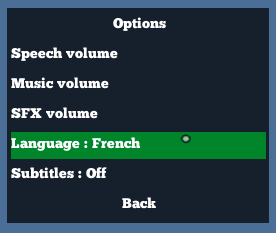
To change language in-game, choose it from within the Options menu as provided by the default interface:
Alternatively, you can set the current language using the Save: Set Option Action.