In this tutorial, we'll add the ability to enter in a custom name when we save the game. This is an advanced tutorial, so you're advised to brush up on menus, parameters, and ActionLists before tackling it!
We'll be modifying the Adventure Creator's default Save menu, so make sure you have it to begin with. If you selected Default AC as your Menu choice when using the New Game Wizard, then you'll have it. Otherwise, you can copy it from the Demo's MenuManager asset: just set the Asset file at the top of the Menu Manager to Demo_MenuManager, copy the Save menu, and paste it in your own.
The default Save menu looks like this:
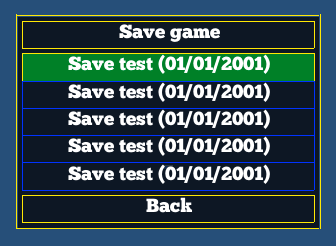
It consists of three elements: a Label at the top (for the menu's title), a SavesList that lists our saves, and a Button that returns us to the Pause menu. When we normally click on a save entry in the SavesList, the game will then save automatically. However, we instead want a step in-between: an Input box should appear, to allow us to name our save. Let's create that menu now.
In the Menu Manager, click on Create new menu under the list of menus. Name it SaveName.
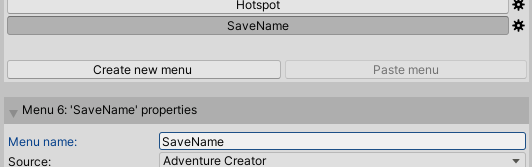
Since we'll only be displaying this menu at specific times, leave it's Appear type as Manual, and check Pauses game?, to keep its behaviour the same as the existing Save menu. This tutorial won't cover styling the menu - here, we've just assigned a simple transparent grey texture as the Background texture:

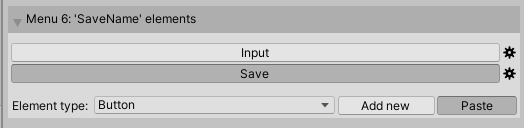
Select Input from the list of Element types below, and click Add new. This will be the box that our save name can be edited in. Leave it's name as Input, but set the Text alignment to Upper Left, and set the Size to Manual. Then increase the width to 30:

To make the Input box more user-friendly, check Allow spaces?, and increase the Character limit to 25.
Now add a Button element, setting both it's Name and Button text to Save. Again, set it's Size to Manual, but this time increase the width to 15. Optionally, you can assign a Highlight texture.

Duplicate the Save button by clicking the cog icon to the left of it in the list of elements, choosing Copy, and then clicking Paste underneath:
Give this new button the name, and text, of Cancel. Because our menu's set to list elements in order, it's displayed underneath the Save button - while we instead want to display the two buttons side by side. In the menu's properties, change the Size setting to Manual, and reduce the height to around 11:

Now change the Cancel button's Position setting to Relative To Menu Size, and use the sliders to reposition the button next to the other:

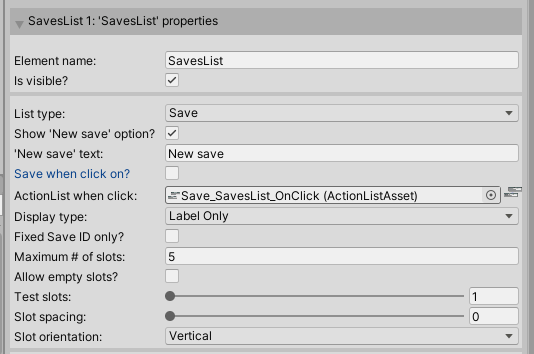
We'll come back to this menu, but we're done with it for now. Re-select the Save menu, and then the SavesList element within it.
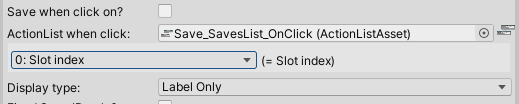
Uncheck Save when click on? within the SavesList element's properties, and then click the + icon beside the ActionList when click field.
When the player clicks on an entry in the SavesList, we want our new SaveName menu to show. However, we also need a way of knowing which slot we clicked on once a name has been entered. To that end, we'll make use of parameters. Select the Save_SavesList_OnClick ActionList and view its Inspector window. Check Use parameters?, and create a new parameter named Slot index, with a Type set to Integer:

Switching back to the Menu Manager, notice that a new popup box listing the asset's parameters has appeared beneath the ActionList asset field. Select (0) Slot index - this will cause our new parameter to take the value of the slot that was clicked on (starting from zero). For example, clicking the third slot down will set the parameter to "2":
If Allow empty slots? is checked, then this parameter will be instead linked to the Save ID value. In this case, name the parameter Save ID, and have the Save: Save or load Action covered below overwrite the save ID, not the index.
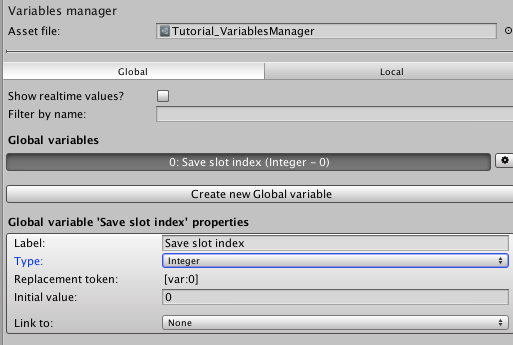
We'll next need to store this parameter more permanently, so that we can retrieve it's value once the player has typed in a save name. Open the Variables Manager, select Global, and then Create new Global Variable. Name the new Variable Save slot index, and set it's Type to Integer.
Return to the ClickSave ActionList, and create a new Variable: Set Action. Set the Variable to Save slot index, and the Statement to the Slot index parameter.

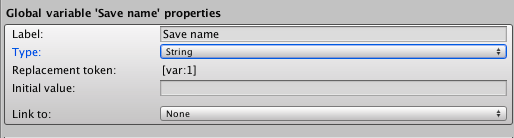
This will copy the parameter's value onto the Variable for later use. Next, we want to set the text on the SaveName menu's Input box to the save entry's original name (so that the player can opt to not rename it at all). We can do this by using the Menu: Set Input Box text Action - however, we will first need to create another Global Variable to store the text in temporarily. Back in the Variables Manager, create another Global Variable - this time naming it Save name, and it's Type to String.
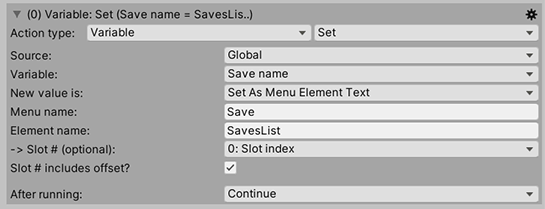
Return to the ClickSave ActionList, and create another Variable: Set Action. This time, we'll want to store the contents of the clicked save slot into the newly created Variable. We can do this by using another Variable: Set Action. Set the Variable to Save name, and New value is to Set As Menu Element Text. The fields beneath it will change so that we can choose which menu element (and slot) is read from: set the Menu name to Save, the Element name to SavesList, and the Slot # (optional) to the Slot index parameter. As the slot index parameter already accounts for the SavesList element's offset, we'll also need to check Slot # includes offset?.
Now that the contents of the save slot the player clicks is stored in a Variable, we can copy it onto the Input element. Create a third Action - this time a Menu: Update content. Set the Menu containing Input to SaveName, the Input element name to Input, New text is to Global Variable, and the String variable to Save name:

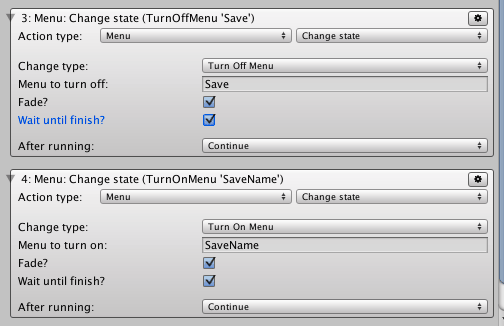
We're now ready to hide the Save menu, and show the SaveName menu. Create two Menu: Change state Actions - one that turns off Save, and another that turns on SaveName. Optionally, you can choose to fade the two menus:
Let's now add logic to the SaveName menu. Select it in the Menu Manager, and then select the Cancel button. We'll want this button to simply return us to the Save menu, so set it's Click type to Crossfade, and Menu to switch to to Save.

Now select the Save button element, and click Create beside the ActionList to run field to automatically create and assign another ActionList. Rename it to ConfirmSave. Before we edit the ActionList, we also want pressing the return key in our Input box to have the same effect as clicking the Save button. Select the Input element, and set the 'Enter' key's linked Button to Save.
Back to the ActionList: select the ConfirmSave asset, which will do the job of saving the game with our custom label. Once again, we'll need to store the updated save name into our String variable. Create a Variable: Set Action, set the Variable to Save name, and New value is to Set As Menu Element Text. We'll set the string to be whatever the player typed, so set the Menu name to SaveName, and the Element name to Input.

If we save the game by using Actions, as we're about to do, then we'll first need to turn the SaveName menu off - otherwise it'll be turned on again when we load a save. Create a Menu: Change state Action, and use it to turn off SaveName:

Next, create a Save: Save or load Action, and set the Method to Overwrite Existing Save. This will still work if the player clicked on the "New save" slot.
We want to save in the same slot that the player originally clicked on, so set the Save to overwrite to Slot Index From Variable. This is why we created an Integer variable: we can now set the Integer variable that now appears to Save slot index.

We want to set the new save's label with the contents of our Input box, so check Update label?, and then With custom label?. This will cause a Custom label text box to appear. To make use of the "Save name" variable's value, we can use its replacement token of the form [var:X], where "X" is replaced by the ID number of the variable:

To get the replacement token for a specific variable, select that variable in the Variables Manager and right-click the Replacement token field.
Your player can now define a custom label when saving the game! Be aware that the Save: Save or load Action to save the game will only work if saving is possible: you cannot save during cutscenes, nor during conversations. You can use the Save: Check Action to determine if saving will be succesful, and hide any buttons to bring up the Save menu if it won't be - though the Save button on the default Pause menu will hide itself automatically.