For a video tutorial on linking a new Menu with Unity UI, see here.
In the last tutorial, we customised the default Pause menu, which was being drawn with AC's built-in rendering system. This is useful for rapid prototyping, but Unity UI gives you a lot more control over styling.
This time, we'll make a simple Inventory bar using Unity UI, and hook up to our menu system.
If you need a refresher on Unity UI, have a look at these tutorials first.
In a blank scene, create a Panel element by choosing Create → UI → Panel in the Hierarchy window.
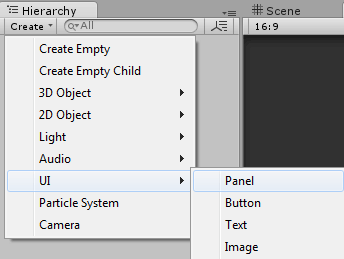
Unity will create both a Panel and a Canvas, which can be viewed in the Scene window in 2D mode.
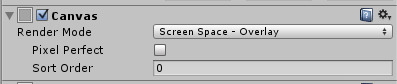
Though Adventure Creator supports all three render modes, this one will work in the default Screen Space - Overlay mode as set by the Canvas.
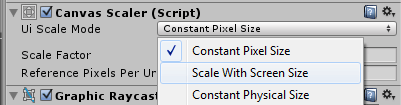
Select the Canvas, and find the Canvas Scaler component in the Inspector window. Set the UI Scale Mode to Scale With Screen Size, so that our UI is resolution-independent.
Select the Panel, and resize it in the Scene Window so that it sits horizontally in the top-left corner of the Canvas.
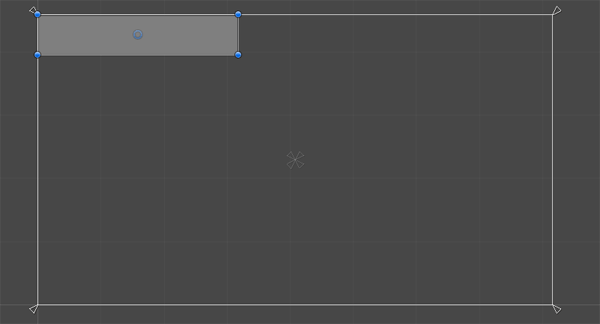
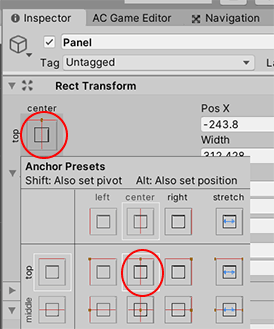
To keep it there if the screen changes size, align its Anchor values to the middle-top of the screen by clicking the Anchor Preset icon in its RectTransform component:
The Panel marks the boundary area of our Menu. Though it can still be invisible, it is still necessary to have.
Our Inventory bar will have four Inventory slots, with two buttons either side to "shift" the items across (which will be necessary when the player is carrying more than four items). We'll start with the side buttons.
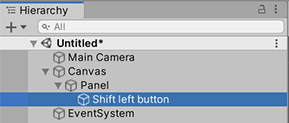
In the same way that we created our Panel, choose Create → UI → Button. Parent it to the Panel, and rename it Shift left Button:
Expand it in the Hierarchy and remove its Text child object.
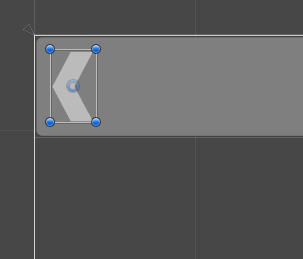
Position it on the left side of the Panel. You can style it however you like, but in this tutorial, we've removed it's Text component and assigned arrow-left-sprite as its Image.
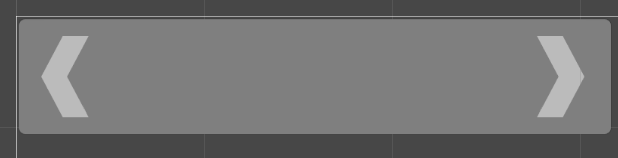
Duplicate the button and position it to the right side. Rename it to Shift right Button.
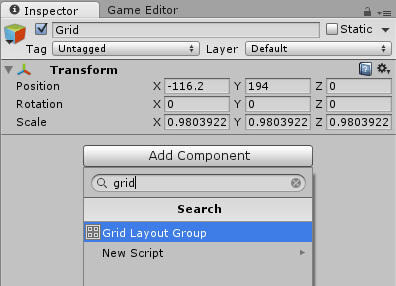
Each of our Inventory slots will be a separate UI button, but we'll arrange them in a grid so that their sizes can all be set together. Create an empty GameObject, parent it to the Panel, and name it Grid. Add the Grid Layout Group Component to it.
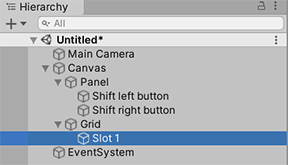
It will now appear as a rectangle in our UI. Create a new Button in the same way we did before, and name it Slot 1. Delete it's Text child component, and parent it to the Grid. The Hierarchy window should look like this:
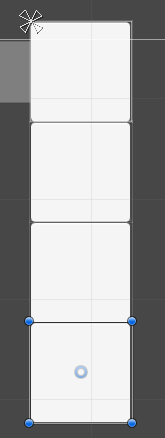
Notice how Slot 1 changes to a square once it's a child of Grid. Duplicate Slot 1 three times, and name them 2-4. The four buttons will now be arranged in a single column.
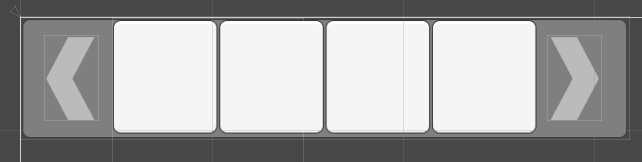
Select the Grid, and find the Grid Layout Group component in it's Inspector. Set the Constraint to Fixed Row Count, and the Constraint Count to 1. The buttons will now be arranged horizontally. Reposition the Grid object, and adjust the Cell Size values so that the buttons sit within the Panel.
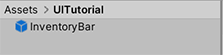
We'll want the Inventory bar to appear in any scene, so prefab it by dragging the Canvas into a folder in your Project window. Rename the prefab InventoryBar.
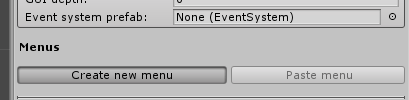
We are now ready to link it to Adventure Creator. Open the Game Editor, and select the Menu Manager. Click Create new menu.
At runtime, Menus are processed in the order they are listed in the Menu Manager. It is therefore best to keep the Hotspot menu at the bottom, which can be done by clicking the cog icon beside it and choosing Re-arrange -> Move to bottom.
In the new Menu's properties box, set the Menu name to Inventory, and change it's Source to Unity Ui Prefab. Some of the visual properties associated with the "Adventure Creator" Source option will disappear from view.
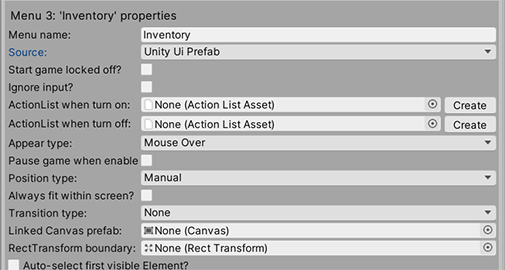
In their place, Linked Canvas prefab and RectTransform boundary fields have appeared. Assign the InventoryBar prefab as the Linked Canvas prefab, and then double-click the prefab asset file to open it up in Unity's Prefab Mode. From here, drag the Panel object onto the RectTransform boundary field.

After assigning the Panel a Recorded ConstantID box will appear beneath it. The number beside it is necessary for the two systems to link: a Constant ID script will have been added to the Panel prefab as well.
We'll make our Inventory bar fade in when the mouse hovers over it. Set the Appear type to Mouse Over, the Transition type to Canvas Group Fade, and the Transition time (s) to 0.2.
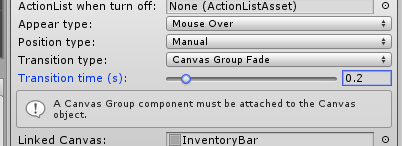
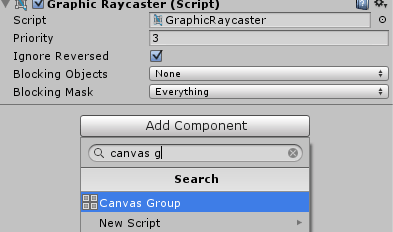
For the fade transition to work, we'll need to add a Canvas Group component to the Canvas.
Select the InventoryBar prefab, and add a Canvas Group.
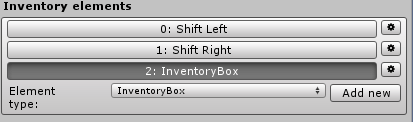
Now we can link the UI's elements as well. Back in the Menu Manager, look for the Inventory elements list, and add two Button elements. Name them Shift Left and Shift Right.

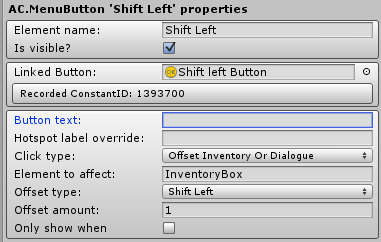
Select Shift Left, and assign the UI prefab's Shift left Button as the Linked Button element property. Clear the Button text, and set the Click type to Offset Inventory Or Dialogue. In the Element to affect box, type in InventoryBox. We'll create this element soon.
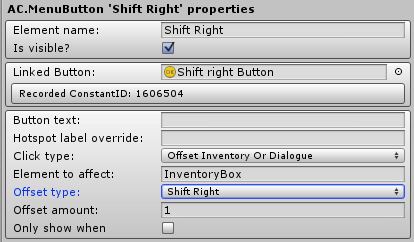
Select Shift Right, and assign the UI prefab's Shift right Button as the Linked Button element property. Clear the Button text, and set the Click type to Offset Inventory Or Dialogue. In the Element to affect box, type in InventoryBox. Set the Offset type to Shift Right.
Now let's assign our Inventory slots. Create a new InventoryBox element, and leave it's name as the default.
In the InventoryBox element's properties list, set the Max number slots to 4. Each Button in our prefab will need to be assigned to each slot in the Menu Manager. Again, double-click the prefab in Unity's Project window to open it up in Unity's Prefab Mode and drag each of the Slot buttons from the Hierarchy into the Linked Button fields in the Menu Manager.
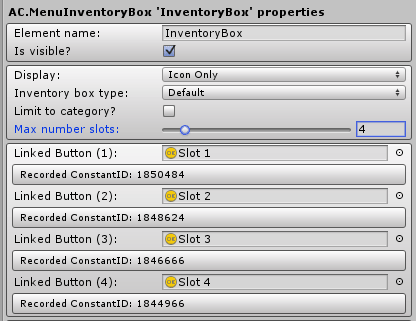
Each Button in the scene will have been given it's own Constant ID number - these changes will be saved automatically once we exit Prefab Mode.
Our UI is now complete. The UI can now be removed from the scene, as it will be created at runtime automatically by Adventure Creator.
This also goes for the EventSystem - Unity will have added one to the scene when we created a new Canvas, but this can be removed as well. Doing so will allow AC to bring in its own EventSystem prefab, which can be overridden in the Menu Manager.
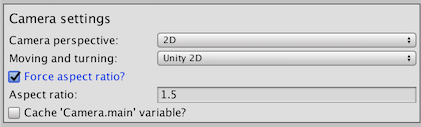
Accounting for enforced aspect ratios
It is possible to lock your game to a fixed aspect ratio by checking Force aspect ratio? in the Settings Manager and supplying a ratio as a decimal:
The game's playable area may also be enforced on mobile devices that have notches - to avoid such notches obscuring gameplay.
In either of these cases, black borders will be drawn around the screen's edges whenever the physical window size doesn't match the enforced aspect ratio. This is an effect added by AC, so your UI Canvas will not automatically update to reflect this - but this is simple to do manually.
Select your UI's root Canvas and view it's Inspector. Click Add component, and find the Auto-correct UI Dimensions component.
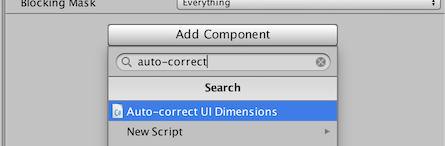
Check both Update Position and Update Scale, and set both of the minimum and maximum anchor points to (0, 1). This correlates to the top-left corner of the screen - meaning the UI will always be correctly positioned in the top-left corner, regardless of enforced aspect ratio.
For more examples on the Auto-correct UI Dimensions component's usage, see the default UI prefabs provided in the /Assets/AdventureCreator/UI project folder.