In this tutorial, we'll create an object that the player can pick up and manipulate with the mouse cursor or touch screen. Though we'll be using the "rock" asset from the Physics demo, these steps will work for any mesh object.
To follow along exactly, download the physics demo package file below and import it into your project.
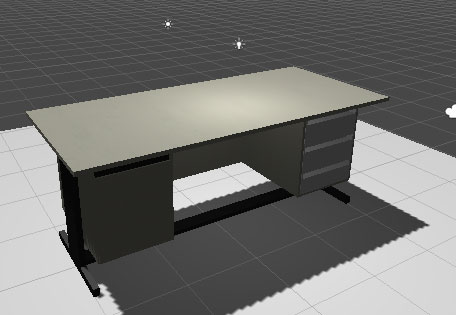
First, we'll add in the table that will house our drawer. Find the Table model inside PhysicsDemo → Models → Table, and drag it into the scene. This model also contains the drawer model that we'll be using. Though it actually contains three drawers, we'll only be affecting the top one for now.
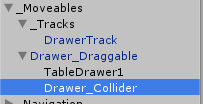
Next, open the Scene Manager and find the list of prefabs. If they aren't listed, click Organise room objects, and then look for the Draggable icon underneath Moveable.
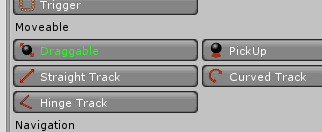
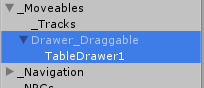
Double-click the icon to create a new Draggable prefab, and rename it Drawer Draggable. Next, drag TableDrawer1 (a child of the Table model) onto the prefab, so that it becomes a child object.
Your hierarchy should look like this:
We want our Draggable prefab to be where the drawer model is, so select TableDrawer1 and copy it's Transform component by clicking the cog to the top-right and choosing Copy component.
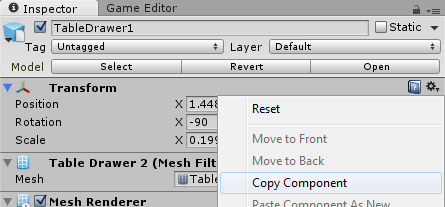
Then, select Drawer Draggable, and choose Paste Component Values from the same menu. The drawer model will be affected as well, so re-select it and finally choose Reset from the cog menu.
In order to make the drawer slide, we need to define a Track for it. A Track acts as a guide - it will limit the drawers movement in a pre-determined way. Since a drawer can only move in and out, we want a
Straight Track. Add one to the scene by double-clicking Straight Track within the Scene Manager. Rename it DrawerTrack
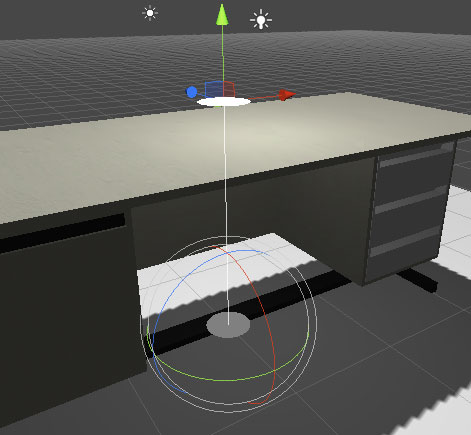
A strange-looking gizmo will have appeared in the Scene window, but it's simple to understand: the white line is the locus (the path) that the drawer will be able to take, while the two circles represent it's limits. The grey circle is it's minimum boundary (it's '0' position), and the white is it's maximum boundary (it's '1' position). The minimum position (the grey circle) is always at the centre of the Track object.
Since our drawer is already in it's 'closed' position, we want our Track to begin in the same place. So, just as we did before, select DrawerTrack and paste the copied Transform values. Only the position values are needed: reset the Scale fields to 1, and rotate it such that the white circle protrodes outward, in the direction that the drawer will move.
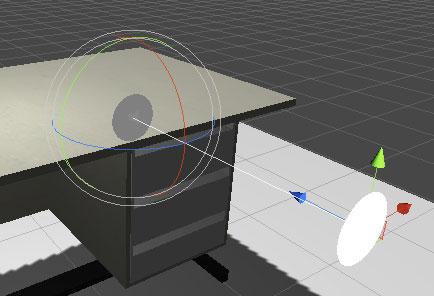
Our Track is a bit too long, and this will cause our drawer to slide out too far. We can reduce it's length by dragging the white circle towards the grey. Move it inwards to an appropriate amount:

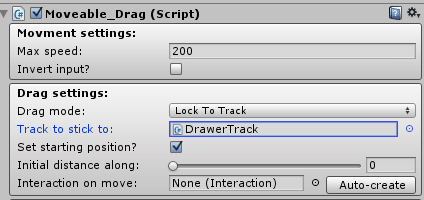
Now that are Track is set up, we can now link it to our sliding drawer. Select Drawer Draggable, make sure that it's Drag mode is set to Lock To Track, and assign DrawerTrack as the Track to stick to.
Scale the Sphere Trigger's Radius up to 2, so that it's easier to click on. And to be sure that the drawer doesn't wobble, lock each of the Freeze Rotation flags in the Rigidbody component.

To note: the Rigidbody's Drag value is altered dynamically by Adventure Creator during gameplay. To make a draggable object feel heavier, just increase the mass.
Run and test the scene. You should be able to drag the drawer in and out. If you can't, check that there are no other colliders in the way.
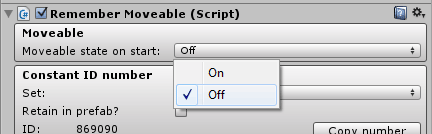
As it turns out, a Sphere Collider isn't quite appropriate for the "click boundary". However, a Sphere Collider is still necessary, since it's used by Adventure Creator to position it's limiting colliders correctly. As with the last tutorial, we'll create a new Collider, only this time we won't delete the original. Instead, ensure that the Sphere Collider does not respond to mouse clicks by setting the Moveable state on start to Off (within the Remember Moveable component). This will place the object on the Ignore Raycast layer when the game begins.
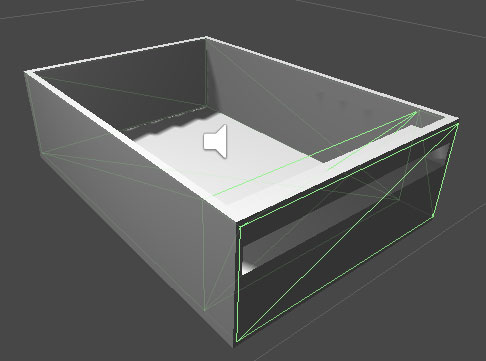
Though we could make use of a Box Collider, the physics system takes the "grab point" into account when making calculations. For realism, it's better to use a custom Mesh Collider that more accurately descibes the shape of the drawer. Luckily, the Physics Demo comes included with such a mesh!
With Drawer Draggable still selected, add an empty child to it by choosing GameObject → Create Empty Child from the top toolbar. Rename it Drawer_Collider.
Add a new Mesh Collider to this child object, and set it's Mesh field to DrawerMeshCollider. You may have to scale it up so that it covers the boundary of the drawer (table hidden for screenshot):
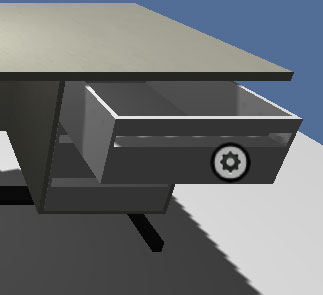
Our drawer can now be manipulated realistically in-game. To make it more clear to the player where on the mesh it's being "grabbed", just check Icon at contact point? under Icon settings.
In the next tutorial, we'll place an object in the drawer that slides around when the drawer is opened.