If your Settings Manager's Movement method property is set to Choose Hotspot Then Interaction, it means that a Hotspot can have multiple "Use" interactions assigned to it that the player can then choose from.
By default, this is handled by an Interaction menu, which appears after the Hotspot is clicked on:
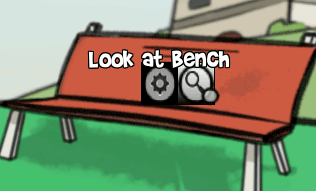
The default Interaction menu includes icons for Use, Talk to and Look at. This can be customised and re-styled within the Menu Manager, while the interaction icons available are defined in the Cursor Manager.
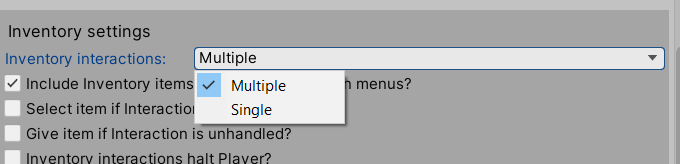
Inventory interactions can be made to behave in the same way. After setting the above option, go to the "Inventory settings" panel beneath and set the Inventory interactions property to Multiple:
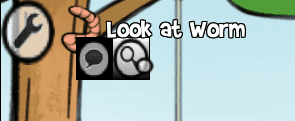
Once set, it becomes possible to define multiple "Standard interactions" for each item defined in the Inventory Manager:

Each interaction requires a cursor icon and ActionList asset to be defined. When an item is then clicked by the player inside an Inventory menu, the Interaction menu will then appear for that item:
In order to combine it with a Hotspot or another item, an item must be selected. This can be done by using the Inventory: Select Action within one of the item's standard interactions. Alternatively, this can be automated if an interaction is defined, but no ActionList asset is assigned. To do this, check Select item if Interaction is unhandled?, and then assign an Interaction icon underneath:
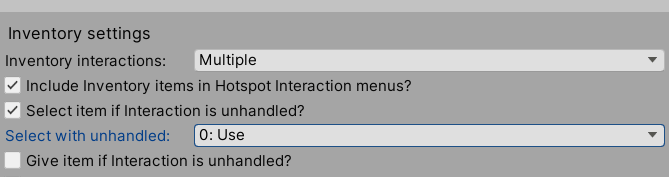
It is also possible to combine inventory items by having their icon appear as part of the Interaction menu. This is handled by the Include Inventory items in Hotspot Interaction menus? option. Once checked, your Interaction menu must also include an InventoryBox element whose Inventory box type property is set to Hotspot Based. This is already the case with the default Interaction menu.