Particularly common in mobile adventure games is the act of displaying a pop-up window whenever the player adds an Item to their Inventory, showing the name of the item as well as what it looks like. In this tutorial, we'll create a Menu that serves this purpose, and create an ActionList that can be called upon to display it whenever an item is picked up.
This tutorial will cover Menus as well as ActionList parameters, so you may wish to check out those tutorials first if you're unfamiliar with them.
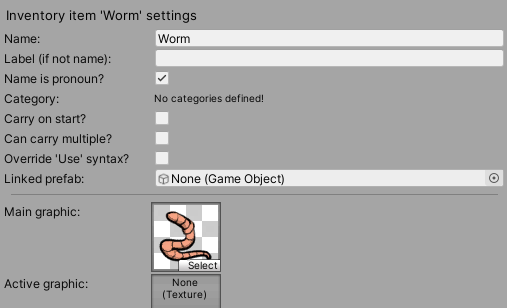
To begin with, we'll make sure that we have an item to test with defined in the Inventory Manager, with both a name and a texture:
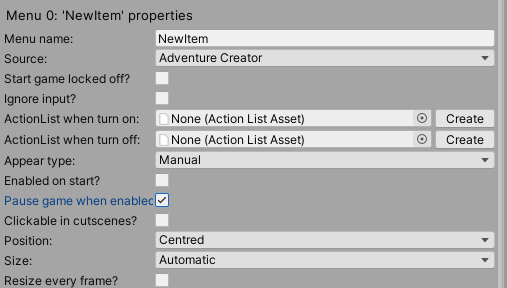
Next, we'll create the pop-up window itself. Go to the Menu Manager and create a new Menu named NewItem. Set its Appear type to Manual, and (optionally) check Pause game when enabled?.
This Menu will consist of three Elements:
- A Label element to display the name of the item
- A Graphic element to display the item's icon
- A Button element to close the Menu when clicked
At the bottom of the Menu Manager, create a new Label element and - for help with styling purposes - set its Label text property to New item. This text will be updated at runtime, but this will help us style the menu while editing.
Then, create a Graphic element and set its Graphic type field to Normal, and assign a temporary texture in its Texture field. Again, this will be set dynamically at runtime.
Finally, create a Button element, and set its Click type to Turn Off Menu.
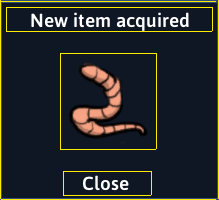
How the Menu is styled will depend on its Source property. When set to Adventure Creator, styling options appear within the Menu's properties, and can be previewed in the Game window. When set to Unity Ui Prefab, styling is based on a separate Canvas prefab that's mapped to each element - a tutorial on this can be found here. The styling of your Menu will be based on your preference, but a simple design that accounts for the three elements is as follows:
Now, we'll add the logic that displays this Menu - and updates its appearance - whenever we pick up an item. To handle this, we'll make use of Global Events, which are a way of running ActionLists when common tasks are performed.
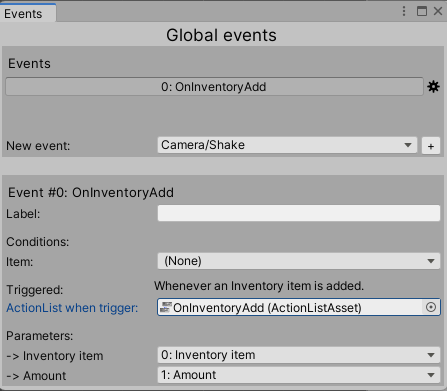
In the top toolbar, choose Adventure Creator -> Editors -> Events Editor. Use the New event panel at the bottom to create a new Inventory / Add event:

As we'll want this event to run for all items, leave the Item condition as None. To automatically create and assign an ActionList to run at this time, click the + icon in the lower-right corner.
Notice how this process has also produced two new parameter fields in the Editor window: one for the Inventory item being added, and one for the amount of that item being added. Both of these parameters have been automatically created in the new ActionList, and mapped to the event:
This means that whenever the ActionList is run - as a result of a new item being added - its parameters will be automatically assigned to the values of the new item. We'll use the "Inventory item" parameter to update our NewItem menu before turning it on.
We'll start with the Label element, which should be set to the name of the item. In our new ActionList (by default, named "OnInventoryAdd") create a Menu: Update content Action, and have it reference the NewItem menu's Label element. Use the ActionList's Inventory item parameter to override the New label field:
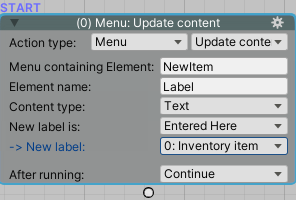
Alternatively, if we want to precede the item's name with the text "You have found:", we can set the New Label field directly, making use of the parameter's label token, [paramlabel:0]. Details on available tokens can be found in the Manual's Text tokens chapter.
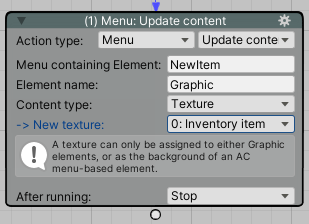
Next, we'll update the Graphic element in a similar way. This time, however, we'll need to set the new Action's Content type to Texture:
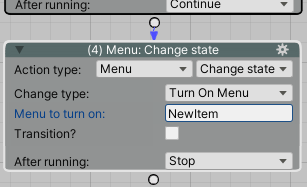
Finally, we need to open the NewItem menu, which can be done with the Menu: Change state Action:
If we now run the game, we should find that the NewItem menu now appears whenever an item is added to the Inventory.