In the previous tutorials, we updated the Subtitles menu to display a portrait of the speaking character, and vary it given their current expression. Here, we'll animate their portrait graphic based on their actual speech - a process known as lip-syncing.
Lip-syncing works by gathering phoneme (or lip) shapes for a speech line, and using those shapes to animate the texture over time. We can choose how these phonemes are gathered with the Speech Manager's Lip syncing option.
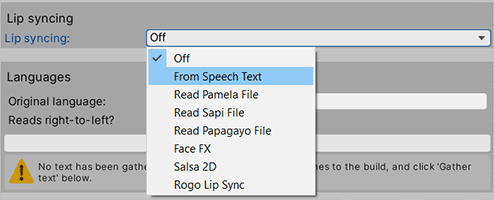
What mode it is set to is up to you. From Speech Text requires no external files, and is good if you don't use speech audio, but the results are less accurate.
Read Pamela file will tell Adventure Creator to search for files generated by Pamela, much in the same way as it searches for audio files. Pamela is a Windows-based application and can be downloaded for free here. It is a good choice if you want full control over the phonemes.
Read SAPI file will tell Adventure Creator to search for files generated by Sapi, which is another free Windows application, and is available here.
For a full guide to the various lip-syncing options, see the Manual's Lip-syncing chapter.
To make use of Pamela and Sapi files, you must use also be using speech audio. This tutorial covers the process of preparing audio, and should be read first. Lip-syncing files are expected to be of the same name as their associated audio clip, but with a .txt extension, and placed in a Resources/Lipsync folder. For example, if an audio file Player2.mp3 is placed in Resources/Speech, it's lip-sync file Player2.txt must be placed in Resources/Lipsync.
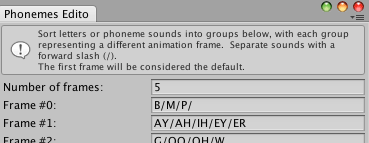
Regardless of which method you choose, you must then choose which phoneme is used by each frame of animation. In the Speech Manager, click Phonemes Editor.
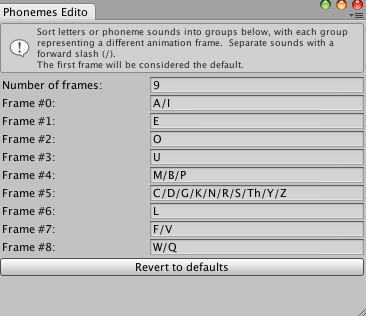
Click Revert to defaults, and the editor will reconfigure itself to recommended defaults based on your chosen Lip-sync method - though you may have to tweak it further. Phonemes are separated by forward slashes.
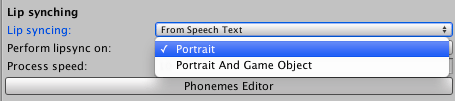
Once you have set up your phonemes, we can animate our portrait graphic. In the Speech Manager, set Perform lipsync on to Portrait.
We now need to supply an animated texture - that is, a texture made up of frames arranged in a grid. Each frame in the texture will correspond to the phoneme frames we declared in the Phonemes Editor. This is a typical such texture:
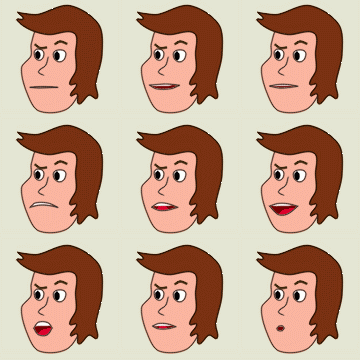
(Credit: Catnap Studio)
The animation must have as many frames as were declared in the Phonemes Editor. Each frame will have to correspond to each group of phonemes we just listed. For example, according to this list of phonemes, the first frame will correspond to "B", "M" and "P" sounds, while the second will correspond to "AY", "AH", "IH", "EY" and "ER" sounds:
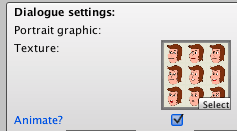
Assign your texture into your Character's Inspector, and check Animate?.
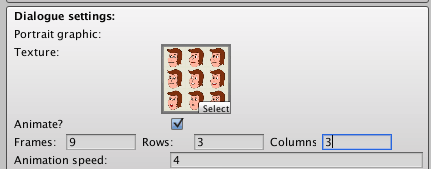
Set the Frames to 9, and both the Rows and Columns to 3. The Animation speed can be ignored.
Now when our Character speaks, his portrait graphic will be lip-synced.