Letting the player converse with NPCs is a common feature of adventure games. They work by giving the player a selection of dialogue lines to choose from, and issuing a response from the NPC. In this tutorial, we'll create a two-level conversation tree about hippos.

NPCs can be created by using AC's Character Wizard, which is available at the top toolbar. However for demo purposes, you can also create an "empty" NPC simply by attaching the NPC script to any GameObject. This script by itself won't produce any graphics or animation, but will allow us to assign a speaker other than the player in our Conversation.
We'll also need to have a Subtitles menu to display the character speech, as well as a Conversation menu to show the possible dialogue options. Both of these menus are provided as part of the default interface when using the New Game Wizard.
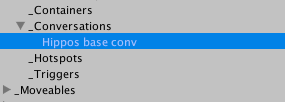
Our dialogue tree will have a couple of levels - with each level being a separate Conversation. In the Scene Manager, click Conversation from the list of Logic prefabs to create one. Rename it Hippo base conv, as this will be our "root" Conversation prefab. If you opted to organise the scene with folders, it'll be placed in the _Conversation object folder:
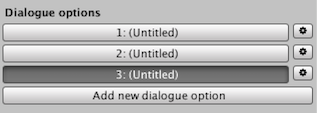
From within its Inspector, click Add new dialogue option three times to create three dialogue options.
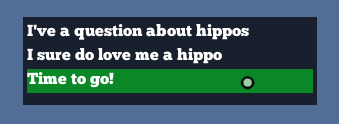
When an option is selected, you can edit its properties - including its appearance when shown in-game. Set the Label field for the three options to the following:
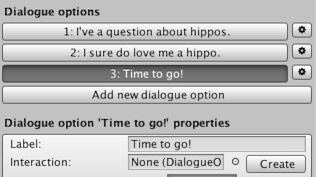
If we wanted, we could define an Interaction ActionList for each option, which would run when that option is chosen. However, it's often easier to store all of our Actions in one place - especially when creating nested dialogue trees such as this one. After setting the labels, leave everything else as it is, and return to the Scene Manager.
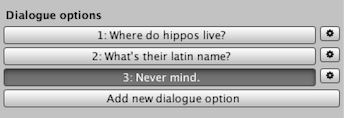
Create another Conversation, this time called Hippos questions. As before, give it three dialogue options, and label them as follows:
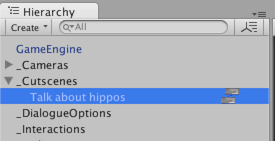
Now that our options have been declared, we can create the Actions that both trigger them and handle their responses. Again from the Scene Manager, create a new Cutscene and name it Talk about hippos. Since this will involve branching options, it will be best to edit this from within the ActionList Editor window. This window can be opened by clicking on the icon to the right of its name in the Hierarchy window.
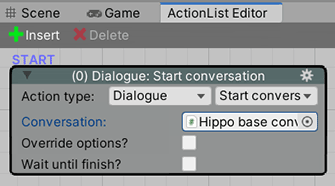
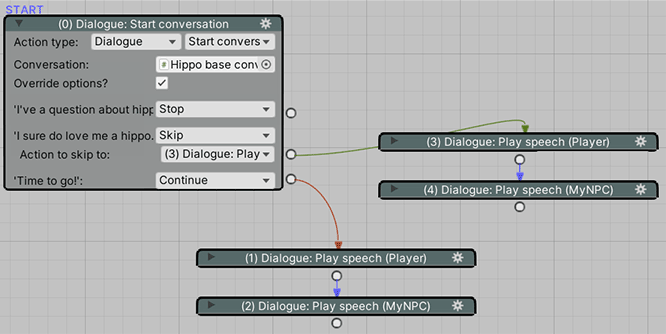
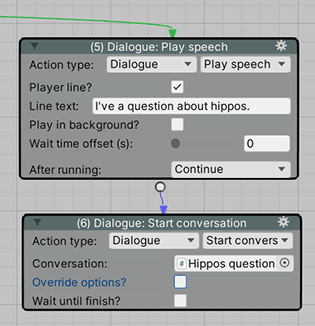
Dock the window into a large space, and set the lone Action to Dialogue: Start conversation. Then set the Conversation field to Hippo base conv.
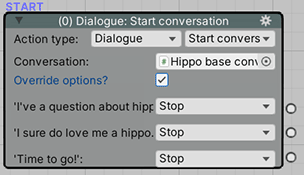
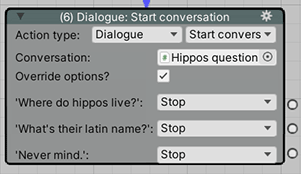
Remember how we left the Conversations Interaction fields blank? That’s because we’ll be telling our game what to do when the player chooses any option right here in the Cutscene. Check Override defaults?, and you’ll see three output sockets appear - one for each option:
Let’s work our way upwards, starting with “Time to go!”. Right-click beneath the Action and choose Add new Action from the menu. Drag a line from the bottom socket into some empty space to create new Action. If the other sockets have connected to it automatically, just drag wires from them into empty space:
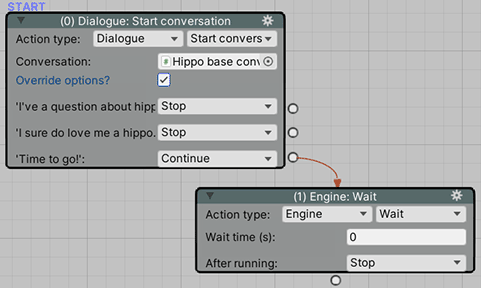
This new Action will then run when the player chooses the third option. Replace the Action with the a pair of Dialogue: Play speech Actions:
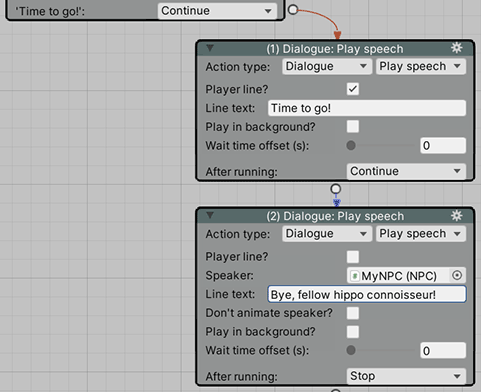
Because the second Action is set to Stop once it has finished running, the Cutscene will end and our Conversation will be over. Now that we’ve finished this branch, collapse both of these Actions by clicking the arrow to the top-left of their nodes, and click Auto-arrange from the top toolbar.
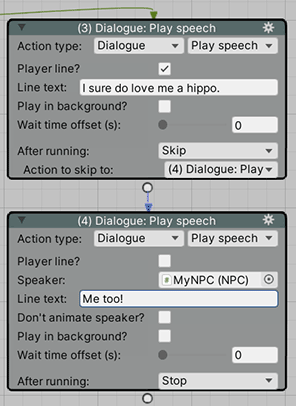
Now let’s build the response for our second option. From the second of the three sockets, create two new Actions, set to the following:
Collapsed, the ActionList should look like this:
This time, however, we want to re-show our dialogue options once these two Actions have finished. To do that, simply drag a wire from the second Actions output socket back onto the Dialogue: Start conversation Action:
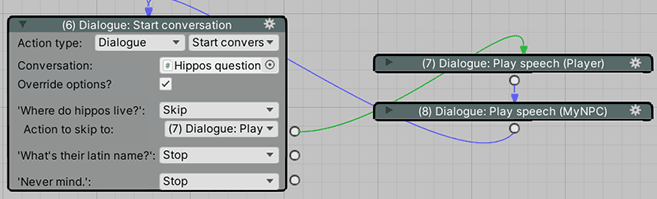
Now we’re ready for the first dialogue option, which will bring up the Hippos questions Conversation. Create the following two Actions, stemming from the first output socket:
Collapse the Dialogue: Play speech Action, and check Override defaults? in the new Dialogue: Start conversation:
This time, we’ll work our way down. Create these Actions for the “Where do hippos live?” output socket:

Collapse, auto-arrange, and drag the second Action’s output socket back to the second Dialogue: Start conversation:
As well as auto-arranging all Actions in an ActionList, you can also choose to only arrange those selected by right-clicking in empty space.
Next, create these Actions for the “What’s their latin name?” output socket:
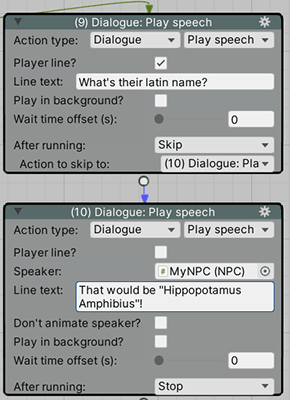
Again, collapse, auto-arrange, and drag the second Action’s output socket to Dialogue: Start conversation:
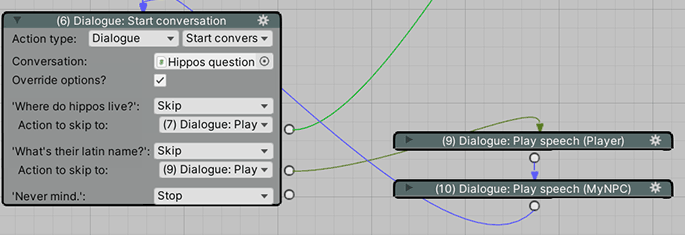
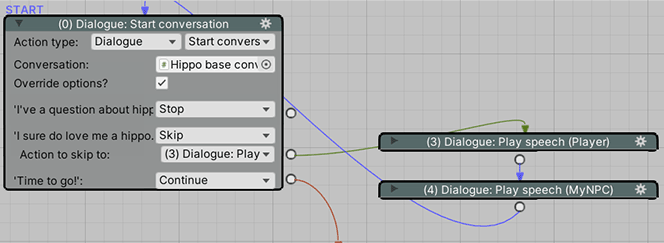
Finally, create this single Action for the “Never mind” output socket:
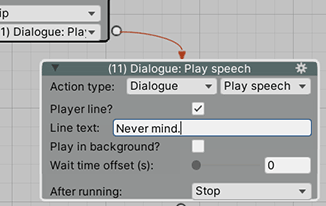
We’ll want this option to result in our going back to the original conversation, so drag the output socket of this Action all the way back to our first Action. Alternatively, you can set the After running field to Skip, and Action to skip to to 0: Dialogue: Start conversation.
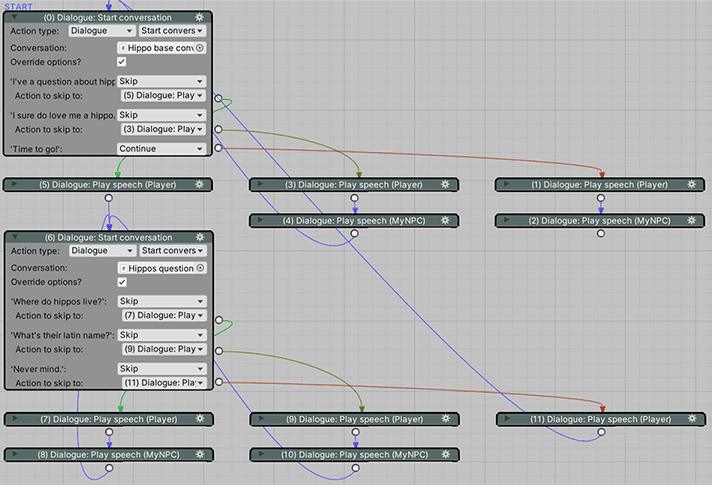
Our full Cutscene should look like this:
We can now call this Cutscene whenever we like in-game to trigger our branching conversation. To test it quickly, simply click Run now in its Inspector whenever the game is running.
We can navigate through the various options, and get appropriate responses, but it could do with some improvement. In the next tutorial, we'll make things a bit more dynamic and interesting.